

DTF Transfer Setup for Brands: A Practical Guide
DTF transfer setup for brands is the process of configuring a DTF printer, heat press, RIP software, adhesive powder, and PET film to produce durable, full-color heat transfers for custom apparel and promotional products. Direct-to-film printing, the recognized industry term, gives brand managers complete control over design quality, order size, and production speed without screen printing minimums or dye-sublimation fabric restrictions. Get the setup right and you can press professional transfers onto cotton, polyester, blends, and even nylon. Get it wrong and you face peeling prints, clogged printheads, and wasted inventory. This guide covers every stage of the dtf setup process so you can build a reliable production workflow from day one.
What tools and materials are essential for setting up DTF transfers for brands?
The core brand DTF setup requires four components: a DTF printer, a curing system, a heat press, and RIP software. Each one handles a distinct job, and skipping or skimping on any of them creates problems downstream.
Core equipment breakdown
| Equipment | Role in the workflow |
|---|---|
| DTF printer | Prints CMYK plus white ink layers onto PET film |
| Curing system (oven or shaker) | Melts adhesive powder onto wet ink before pressing |
| Heat press | Bonds the cured transfer to the garment with heat and pressure |
| RIP software | Controls ink density, white ink layering, and color profiles |
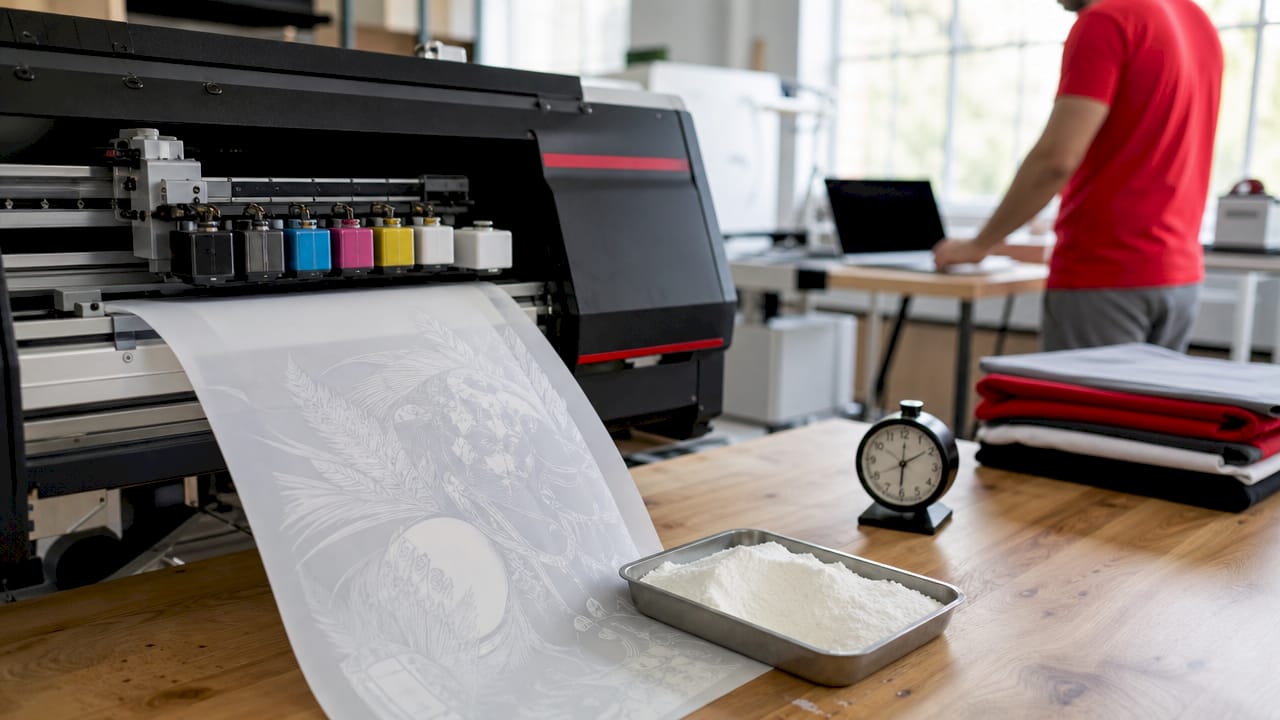
RIP software is the piece most brand managers underestimate. RIP software prevents oversaturation and extends printhead life by managing white ink layers and color profiles. Printing directly from Adobe Illustrator or Canva bypasses those controls entirely and shortens printhead lifespan fast.
Consumables you need on hand
Beyond the machines, your consumables list includes PET film (matte or glossy), CMYK inks, white ink, hot-melt adhesive powder, and blank garments. White ink is the most expensive and most fragile consumable in the system. White ink settles due to titanium dioxide pigment, requiring continuous circulation and frequent nozzle checks to avoid clogging. Budget-level inks save money upfront but clog printheads faster and produce duller colors on dark fabrics.
Pro Tip: Always buy inks and PET film from the same supplier when starting out. Ink-film-powder compatibility directly affects peel timing and adhesion quality. Switching one consumable brand mid-run without retesting is a common cause of unexpected peeling.
How does the DTF printing and pressing workflow actually work?
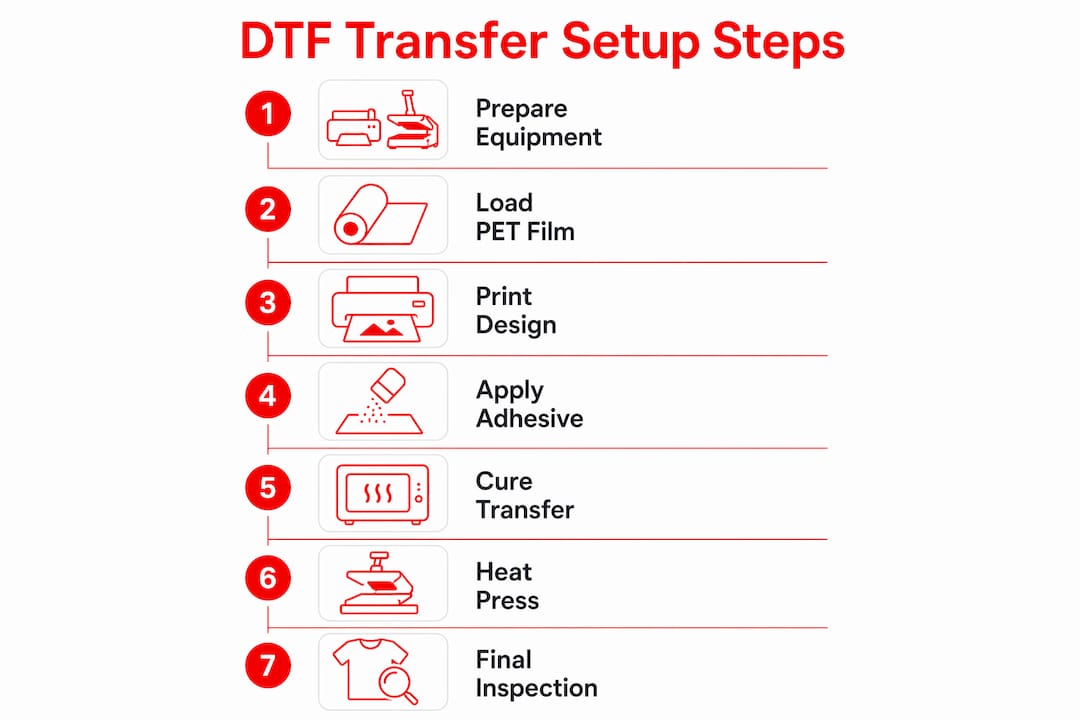
The DTF transfer workflow follows five stages: print, powder, cure, press, and peel. Each stage has specific timing and temperature requirements that determine whether the finished transfer lasts 50 washes or peels after five.
Step-by-step workflow
- Mirror your design in RIP software before sending to the printer. The design prints face-down on PET film, so it must be flipped horizontally.
- Print CMYK layers first, then white ink underbase. The white layer acts as a foundation so colors pop on dark garments.
- Apply adhesive powder immediately while the ink is still wet and tacky. Coat the entire printed surface evenly, then shake off the excess.
- Cure the powder using an oven, conveyor system, or heat press hover method. Ovens cure at 100–110°C for 2–3 minutes, while conveyor systems finish in 30–90 seconds.
- Heat press the transfer onto the garment. Start with 300–320°F for 10–15 seconds with medium-to-firm pressure, then adjust based on fabric type.
- Peel the film according to the film’s specification. Hot peel films release immediately after pressing. Cold peel films require cooling to room temperature first. Warm peel films fall between the two.
- Apply a second press for 5–10 seconds with a silicone sheet or parchment paper on top. This step bonds the transfer edges and significantly improves wash durability.
Recommended press settings by fabric type
| Fabric | Temperature | Time | Peel type |
|---|---|---|---|
| 100% cotton | 300–320°F | 12–15 seconds | Warm or cold |
| Polyester | 270–290°F | 10–12 seconds | Hot or warm |
| Cotton/poly blend | 290–310°F | 10–15 seconds | Warm |
| Heat-sensitive fabrics | 275–285°F | 10–12 seconds | Hot |
Heat press temperatures cannot be standardized universally. Equipment variation demands thermal verification and visual inspection of powder curing as the best quality control. A Teflon-coated platen thermometer is a worthwhile $30 investment before your first production run.
Pro Tip: Pre-press every garment for 3–5 seconds before applying the transfer. This removes moisture and wrinkles, giving the adhesive a flat, dry surface to bond to. Skipping this step is one of the top causes of uneven adhesion on cotton.
Review Handmadeohiocrafts’ DTF pressing instructions for detailed temperature and timing guidance across common garment types.
How do environmental conditions affect DTF print quality?
Your workspace environment directly controls print consistency. DTF printers require 65–80°F and under 60% humidity to keep ink viscosity stable and prevent film from curling or absorbing moisture. A garage in july or a basement in january will produce inconsistent results without climate control.
Ventilation is non-negotiable. Powder curing releases fumes that are harmful in enclosed spaces. A workspace of 100–150 square feet with a filtered exhaust system keeps the air safe and prevents powder particles from settling on wet prints. A basic inline fan with a carbon filter handles this at low cost for most small setups.
Preventing white ink failures
White ink degradation during print runs is often caused by circulation path issues, damper starvation, or air in lines more than printhead failure. Proper baseline and post-job nozzle checks detect and prevent failures before they reach customer orders.
White ink is the most fragile part of any DTF system. Run a nozzle check at the start and end of every print session. If you see missing nozzles or streaking in the white channel, run a cleaning cycle before printing customer jobs. Run at least 3–5 calibration test sheets before starting production to verify nozzle performance and color accuracy.
Visually inspect every cured transfer before pressing. A properly cured adhesive layer looks smooth and slightly glossy. A powdery surface means under-curing. A brown or burnt appearance means over-curing. Both result in poor adhesion or transfer failure on the garment. Document your oven temperature settings and airflow configuration so you can reproduce the same result every time.
Pro Tip: Standardize your consumables. Switching PET film or powder brands mid-production without retesting is a leading cause of unexpected peel failures. When you find a combination that works, stick with it and retest only when you intentionally change a variable.
What are the most common DTF setup mistakes and how do you fix them?
Brand managers who are new to direct-to-film printing run into a predictable set of problems. Knowing them in advance saves significant time and material waste.
- Uneven adhesion or lifting edges. Usually caused by insufficient pressure, low temperature, or moisture in the garment. Pre-press the garment and verify platen pressure with a pressure test sheet.
- Banding or streaking in the print. Almost always a nozzle issue. Run a nozzle check and cleaning cycle. If banding persists after two cleaning cycles, check for air in the white ink lines.
- Powder clumping or uneven coating. Applying powder too late after printing causes dry spots. Apply powder within 30–60 seconds of printing while ink is still wet.
- Transfers peeling after washing. Check curing completeness first. Under-cured powder produces weak adhesion that fails in the wash. Also verify you completed the second press step.
- Color shifting on polyester. High temperatures cause dye migration on polyester. Drop press temperature to 270–285°F and use a heat-sensitive transfer film rated for synthetic fabrics.
Outsourcing DTF transfers is a practical option for brands that want the benefits of on-demand pressing without managing a printer. You store pre-made transfers flat and press them in-house as orders come in. This model reduces unsold inventory and speeds up product launches without the overhead of running a full DTF print setup.
Scaling in-house production means adding automation. A powder shaker automates the coating and curing step, removing the most labor-intensive part of the workflow. Larger format presses (16x20 inches or bigger) let you press multiple items per cycle. Both upgrades pay back quickly at higher order volumes.
Key takeaways
A successful DTF transfer setup for brands requires treating the printer, inks, powder, film, curing system, and heat press as one integrated system rather than independent tools.
| Point | Details |
|---|---|
| Four core components | Every brand DTF setup needs a printer, curing system, heat press, and RIP software. |
| Workflow has seven steps | Print, powder, cure, press, peel, and second press are all required for durable results. |
| Environment controls quality | Keep workspace at 65–80°F and under 60% humidity to maintain ink and film stability. |
| White ink needs daily attention | Run nozzle checks before and after every session to prevent clogging and print defects. |
| Standardize consumables | Lock in one ink, film, and powder combination before scaling to avoid adhesion surprises. |
What I’ve learned after years of running DTF production
The biggest mistake I see brand managers make is treating DTF printing as a plug-and-play process. They buy a printer, load some film, and expect consistent results from day one. That almost never happens.
The reality is that DTF is a system. Every variable, from ink brand to room temperature to press dwell time, interacts with every other variable. When a transfer peels, it is rarely one thing. It is usually two or three small misalignments stacking up. The brands that get reliable results fast are the ones who document everything from the start: oven settings, press temperature, ink batch numbers, and curing times.
I also think most people underinvest in consumables to protect their equipment investment. A $3,000 printer with cheap ink is a liability. Quality inks reduce clogging, extend printhead life, and produce colors that hold up after washing. The XP600 printhead, for example, lasts 3–5 months under daily use with proper maintenance. Cut corners on ink and that timeline shrinks fast.
My honest recommendation: run at least a full week of test production before taking customer orders. Press on every fabric type you plan to sell. Wash test every combination. Build your settings documentation from real results, not from a spec sheet. That week of testing is the cheapest quality assurance you will ever buy.
— Aaron
Handmadeohiocrafts DTF transfers for your brand
Brands that want professional DTF results without building a full in-house setup can work directly with Handmadeohiocrafts. Based in Waverly, Ohio, Handmadeohiocrafts produces custom DTF transfers and finished custom apparel with no minimum order requirements and nationwide shipping.
Every transfer is printed and finished in-house, which means faster turnaround and direct quality control on every order. Whether you need gang sheets for a product launch or finished garments for an event, Handmadeohiocrafts handles the full production process. Visit the DTF transfers page to review file requirements, place an order, or get support from the team directly.
FAQ
What is a DTF transfer setup for brands?
A DTF transfer setup is the combination of a DTF printer, heat press, RIP software, PET film, adhesive powder, and curing system used to produce custom heat transfers for apparel. Brands use this setup to print on-demand without screen printing minimums.
What temperature should I use for DTF heat pressing?
Start at 300–320°F for 10–15 seconds with medium-to-firm pressure on cotton. Drop to 270–290°F for polyester to prevent dye migration, and always verify with a scrap test before production.
Why does my DTF transfer peel after washing?
Peeling after washing is almost always caused by under-cured adhesive powder or a skipped second press. Verify your curing temperature and time, and always apply a second press for 5–10 seconds after peeling the film.
Do I need RIP software for DTF printing?
Yes. RIP software controls ink layering, white ink density, and color profiles. Printing directly from standard design software bypasses these controls and causes oversaturation and premature printhead failure.
Can brands outsource DTF transfers instead of printing in-house?
Yes. Brands can order pre-made DTF transfers, store them flat, and press on demand. This approach reduces inventory risk and eliminates the cost of maintaining a DTF printer while still delivering on-demand customization.
Recommended
- DTF File Requirements | Artwork Setup Guide for DTF Transfers | Handma – Handmadeohio
- HandmadeOhio DTF Transfer Pressing Instructions | Temperature, Time & Tips – Handmadeohio
- DTF Transfers in Cleveland Ohio | Custom DTF Printing | HandmadeOhio – Handmadeohio
- DTF Transfers | Custom Direct To Film Printing | HandmadeOhio – Handmadeohio