

Save Reprints: Cold Peel DTF for Small Shops with Bench Tested 60–90s Cooling
Cold peel DTF means the carrier film stays on the transfer until it cools completely, then lifts clean without pulling ink or leaving a stiff edge. For small shops, hobbyists, and anyone printing fine detail or working on textured fabric, it’s the safer default. The trade-off is speed: cold peel runs slower per garment than hot peel, but it forgives timing mistakes that ruin hot-peel jobs.
TL;DR:
- Cold peel film generally produces a matte, flexible finish and adheres better to textured fabrics like fleece and heavyweight cotton, reducing failure rates for inexperienced operators.
- While cold peel takes roughly 60 to 90 seconds to cool before peeling, it offers more forgiveness for timing mistakes and results in stronger, more durable transfers that can last over a year with proper care.
- Hot peel transfers, which are faster by about 30 to 40 percent, require precise timing and are better suited for large, uniform polyester orders with experienced operators.
- Operators should conduct a peel test on scrap fabric to determine peel type and follow a strict cooling protocol and post-press step to maximize transfer durability and quality.
- For small-volume, detailed, or mixed-fabric orders, cold peel offers better reliability, while high-volume, consistent fabric runs can benefit from hot peel’s speed once the process is well optimized.
Table of Contents
- What Cold Peel DTF Means and Why Cooling Changes the Result
- Hot Peel vs Cold Peel DTF: Which Workflow Actually Fits Your Shop?
- When Should You Choose Cold Peel? A Quick Decision Checklist
- How to Press Cold-Peel DTF Transfers: Settings and Steps
- Why Did My Cold-Peel Transfer Lift or Crack? Fixes That Work
- How Long Do Cold-Peel DTF Transfers Last in the Wash?
- Behind the Settings: How HandmadeOhio Presses Cold-Peel Transfers
- The Real Argument for Cold Peel Isn’t Speed. It’s Consistency.
- Order Cold-Peel DTF Transfers and Custom Apparel from HandmadeOhio
- Sources
What Cold Peel DTF Means and Why Cooling Changes the Result
Every DTF transfer starts the same way: a design gets printed onto PET film, coated with a white base layer, then dusted with a hot-melt adhesive powder. That powder is the whole trick. It sits inert until heat activates it, melting into a bonding layer between the ink and the fabric. What happens after that melt determines whether you’re working with cold peel or hot peel film.
With cold peel, the adhesive needs to cool and re-solidify before you touch the carrier sheet. That cooling window typically runs 60 to 90 seconds, depending on the brand and ambient shop temperature. During that time, the melted adhesive hardens back into a stable film that grips the fabric fibers rather than remaining tacky or half-set. Peel too soon and you’re pulling on adhesive that hasn’t finished bonding, which is exactly why “cold” refers to the fabric’s temperature at peel time, not the press.
The payoff for waiting shows up in the finish. Cold peel transfers tend to come out with a matte, soft-hand feel rather than a glossy plastic sheen, and they grip textured or brushed fabrics like fleece and heavyweight cotton better than hot peel does on the same material.
A few practical markers tell you what you’re holding before you even press it:
- Matte finish film almost always indicates cold peel; glossy film usually means hot peel.
- Double-sided PET film is more commonly formulated for cold peel workflows.
- Packaging silence (no peel type listed) is common enough that most film sold in the U.S. defaults to cold peel, so treat unmarked rolls as cold peel unless told otherwise.
- The sample test: press a scrap, peel one corner warm and one after it’s fully cooled. If the warm peel tears or lifts ink and the cooled peel comes away clean, you’re holding cold peel stock.
If you’re sourcing film for a shop that runs mixed fabric orders, a matte double-sided film in A3/13-inch width tends to be the most forgiving format for handling errors and detailed artwork, since matte hides minor surface flaws that would show on a glossy hot-peel finish.
Hot Peel vs Cold Peel DTF: Which Workflow Actually Fits Your Shop?
The hot peel vs cold peel debate isn’t about which is “better.” It’s about which mistake you’d rather risk. Hot peel rewards speed and precision. Cold peel rewards patience and tolerates a shaky hand.
Timing and finish. Hot peel comes off the press while still warm, right after pressing, which shaves real time off each cycle but leaves almost no margin for error. Peel a hot-peel transfer a few seconds late and the adhesive has already started to set, cracking the print as it lifts. Cold peel builds in a cooling buffer, and that buffer is what makes it forgiving. The visual difference carries through to the final garment too: hot peel usually finishes glossy, cold peel usually finishes matte.
Throughput. This is where hot peel wins on paper. Hot peel cuts cycle time by roughly 30 to 40 percent compared with cold peel, since you’re not waiting out a cooling window between press and peel.
The waste-rate reality: for operators still learning the process, cold peel produces meaningfully lower failure rates than hot peel — inexperienced hot-peel users tend to lose far more transfers to premature peeling and cracked ink than cold-peel users lose to any comparable mistake.
That gap matters more than the raw throughput number for most small shops. A faster process that ruins one transfer in five isn’t actually faster once you count the reprints, the wasted film, and the ink.
Fabric fit. Cold peel handles textured fabric, garment-dyed cotton, and fleece better because the fully-set adhesive grips uneven surfaces more reliably. Hot peel tends to perform best on smooth, uniform polyester where speed matters more than surface grip. If you’re printing on a mix of blanks, understanding how garment-dyed and pigment-dyed fabrics take a finish differently helps you predict which peel type will bond cleanest.
When to standardize. Most shops do best starting with cold peel across the board and only introducing hot peel later, once volume justifies the tighter timing discipline it demands. Adding hot peel makes sense once you’re running large, uniform batches on the same fabric type where the speed gain actually shows up on the clock. Running both from day one usually just doubles your training curve.
When Should You Choose Cold Peel? A Quick Decision Checklist
Run your next order through these four questions before you pick a film:
- What’s the order volume? A single custom shirt or a run under 25 pieces almost always favors cold peel. The time cost per unit is negligible at low volume, and you can’t afford a ruined transfer on a one-off order.
- What’s the fabric mix? If you’re printing across hoodies, tees, and fleece in the same batch, cold peel’s broader fabric tolerance saves you from switching settings mid-run.
- How detailed is the design? Fine text, thin outlines, and multi-color layered graphics benefit from the extra bonding time cold peel provides before the carrier lifts.
- How experienced is the operator? New staff or a first-time hobbyist should default to cold peel until the timing feel for hot peel becomes second nature.
Three scenarios make this concrete:
A single custom order, like one hoodie for a customer’s kid’s birthday, is a clear cold-peel call. There’s no batch to protect if you make a mistake, so the extra thirty seconds of cooling costs you nothing and buys you insurance.
A small-batch brand run, say 50 shirts for a local band or a school fundraiser, still favors cold peel. You’re likely mixing fabric weights, and a cracked transfer on shirt 30 means reprinting film you already paid for.
A high-volume order of several hundred identical polyester tees is where hot peel starts to earn its keep, provided your operator has the timing down and the fabric is consistent enough not to need cold peel’s extra grip. Even then, many shops run a cold-peel test batch first before committing an entire order to the faster method.
How to Press Cold-Peel DTF Transfers: Settings and Steps
Getting a clean cold-peel result comes down to following the sequence in order and not skipping the cooling step, which is the one most operators rush.
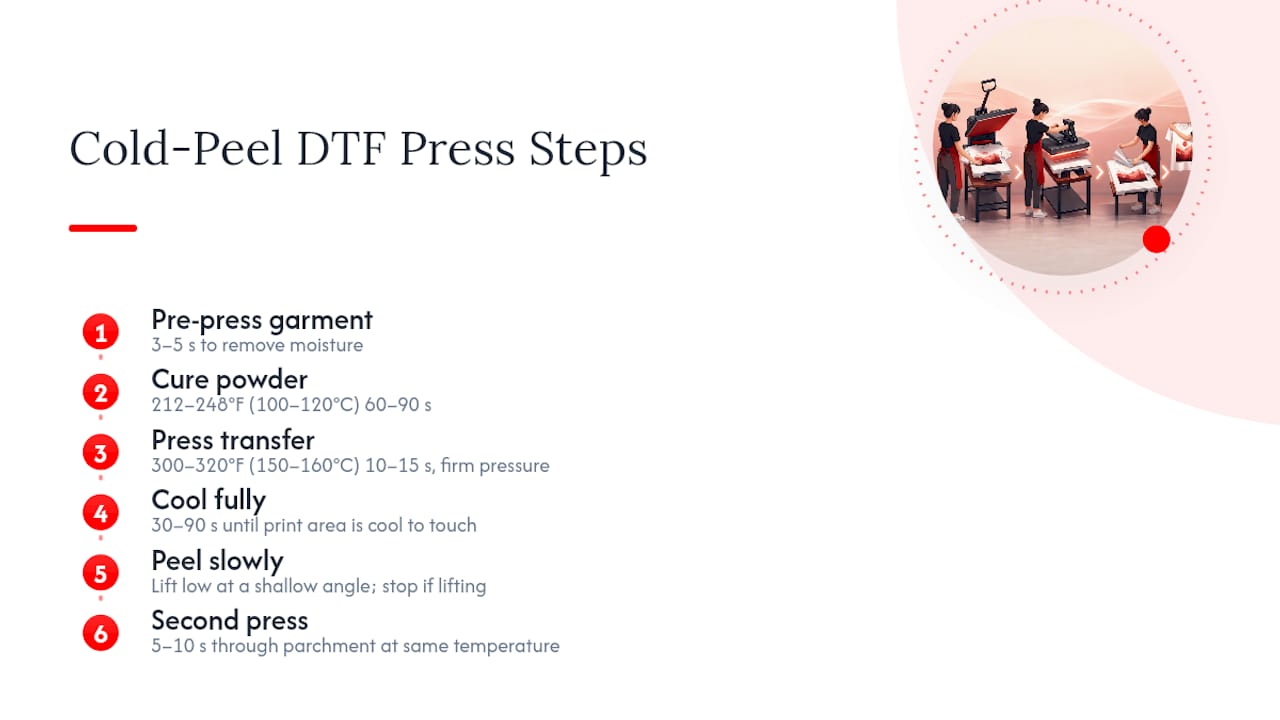
1. Pre-press the garment. Press the blank for 3 to 5 seconds before placing the transfer. This removes moisture and wrinkles that would otherwise trap air under the film and cause uneven adhesion.
2. Confirm the powder is fully cured. If you’re applying your own adhesive powder rather than buying pre-made transfers, melt it at roughly 212 to 248°F (100 to 120°C) for 60 to 90 seconds using a heat gun or curing oven. Under-cured powder is one of the most common causes of a botched peel later.
3. Press the transfer onto the garment. Set the heat press to roughly 300 to 320°F (150 to 160°C) for 10 to 15 seconds, using medium to firm pressure. Firm, even pressure across the whole design matters more than exact PSI. Uneven pressure is a frequent cause of partial bonding at the edges.
4. Cool completely before touching the film. This is the step that defines cold peel and the one shortcuts ruin. Let the transfer sit undisturbed for 30 to 90 seconds, depending on the film brand, until the garment is cool to the touch at the print area. Rushing this step is the single most common reason cold-peel transfers fail.
5. Peel at a shallow, steady angle. Once cool, lift the carrier film slowly and low, close to horizontal rather than straight up. If you feel any resistance or see ink lifting with the film, stop immediately, lay the film back down, and give it another 15 to 20 seconds before trying again.
6. Second-press through parchment paper. Cover the finished print with a parchment sheet or Teflon sheet and press again for 5 to 10 seconds at the same temperature. This locks the adhesive fully into the fabric and is arguably the single biggest factor in long-term wash durability, more than the peel method itself.
Pro Tip: Keep a kitchen timer or your phone’s stopwatch right next to the press. Guessing at “cool enough” is how most beginners peel five seconds too early. A visible countdown removes the temptation to rush.
Full artwork prep and file specs matter just as much as press timing. Check the DTF file requirements guide before sending anything to print, since resolution and color profile mistakes show up just as clearly as a bad peel.
Why Did My Cold-Peel Transfer Lift or Crack? Fixes That Work
Most cold-peel failures trace back to one of three causes, and each has a specific, reliable fix.
Edge lifting during peel. This almost always means the transfer wasn’t fully cool. Peeling too early is the most common cause of edge lift and cracked ink. Lay the film back down immediately, press again briefly, and let it cool for the full window before retrying.
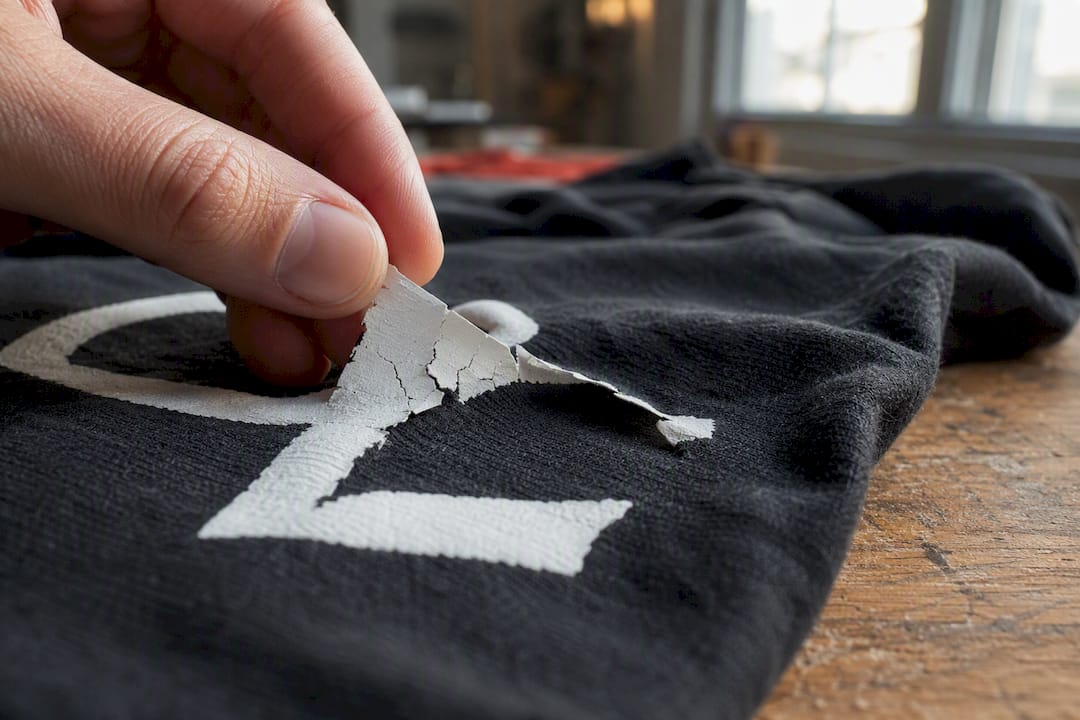
Cracking across the design. This points to under-cured adhesive powder or a press temperature that ran too low to fully activate it. Check your powder cure settings against the 212 to 248°F range and confirm your press is actually reaching temperature, not just displaying it. Cheaper presses can read 20 degrees hot or cold compared to actual platen temperature.
Partial transfer, where some sections stick and others don’t. This is usually a pressure problem, not a heat problem. Uneven platen pressure leaves the edges or corners under-bonded while the center presses fine. A pressure test using parchment paper pressed at your normal settings will show uneven marks if your platen isn’t level.
A few preventive habits catch these problems before they hit a full order:
- Run one sample print on scrap fabric before committing to a full batch, especially with new film.
- Label film rolls by peel type the moment they arrive if the packaging doesn’t already say.
- Keep a pressure-test sheet on hand and check platen evenness monthly, not just when something goes wrong.
When a transfer lifts only slightly and most of the design stayed put, a second press usually saves it. When ink actually pulled away or cracked through the design, reprint. Don’t waste press time trying to rescue a transfer that’s already lost adhesive.
How Long Do Cold-Peel DTF Transfers Last in the Wash?
Wash durability depends more on the second press than on peel type, which surprises a lot of new operators who assume cold peel is automatically more durable because it’s slower and more careful. The 5 to 10 second post-peel press does more for long-term wash life than anything about the peel method itself, so skipping it undercuts even a perfect cold-peel job.
Care instructions that actually extend print life:
- Wash cold, inside out, on a gentle cycle.
- Skip fabric softener. It coats the print surface and accelerates cracking.
- Air dry or tumble dry low. High heat from a dryer is harder on a DTF print than most washing.
- Avoid direct ironing over the print unless using a protective sheet.
Set expectations honestly with customers: a properly pressed and second-pressed cold-peel transfer holds up through normal washing for well over a year of regular wear with reasonable care. That figure drops fast if the garment gets washed hot, dried on high heat, or if the second press got skipped to save time on a rush order.
If you’re printing for a client and sending the shirt out, a one-line care card with the wash-cold, no-softener rule saves you the return call three weeks later when someone asks why the print is peeling at the edges.
Behind the Settings: How HandmadeOhio Presses Cold-Peel Transfers
Aaron, who oversees production content and press documentation, draws on hands-on experience with the equipment and materials used to fill day-to-day custom orders, informing the settings and troubleshooting notes throughout this guide.
Handmadeohiocrafts runs every DTF transfer in-house out of Waverly, Ohio. This means the settings recommended here aren’t pulled from a spec sheet. They’re the ranges that hold up across hoodies, tees, and hats printed daily with no minimum order requirement, whether that’s one custom hoodie for a birthday or a 200-piece school spirit run.
A few things worth knowing if you’re ordering rather than pressing yourself:
- Every transfer ships with the peel type and recommended settings, so there’s no guessing on packaging that arrives unlabeled.
- The DTF pressing instructions page lays out the exact temperature, time, and pressure settings used in-house, matched to the film actually shipped.
- No minimum order size means you can test a single transfer before committing to a full batch, which matters more than most new shops realize until their first bad run.
- The brand setup guide walks through artwork prep specific to gang sheets and multi-design runs.
The house preference leans toward cold peel as the default across most fabric types, for the same reason recommended throughout this guide: it tolerates the small timing variances that happen in a real production environment, where phones ring and orders stack up mid-press. Hot peel gets used selectively, mainly on large uniform polyester runs where the operator’s timing is already dialed in.
The Real Argument for Cold Peel Isn’t Speed. It’s Consistency.
Most advice on hot peel vs cold peel frames it as a speed tax: cold peel costs you time, full stop. That framing misses what actually determines whether a small shop makes money on a print job, which is reprint rate, not press-cycle seconds.
A shop that saves 40 percent on cycle time but reprints one transfer in five hasn’t saved anything. It’s spent that time and film twice. Cold peel’s real value isn’t the finish or even the fabric grip, though both matter. It’s that the cooling window builds in a margin for the interruptions that happen in every real shop: a phone call, a second order stacking up, an operator who’s covering three machines at once.
Where I’d push back on conventional wisdom: don’t treat hot peel as the “advanced” upgrade you graduate to. Treat it as a specialized tool for a narrow use case, high-volume uniform polyester runs, and keep cold peel as your standing default even after your team gets fast. The shops that get burned are the ones that switch to hot peel across the board the moment their timing improves, then hit a busy Friday and start losing transfers again.
Prioritize the second press before you prioritize peel speed. It’s the cheapest five seconds in the whole process and it does more for durability than either peel method alone.
— Aaron
Order Cold-Peel DTF Transfers and Custom Apparel from HandmadeOhio
Handmadeohiocrafts prints every cold-peel DTF transfer in-house with no minimum order, so you can order one test transfer or a full production run without waiting on a supplier’s batch schedule.
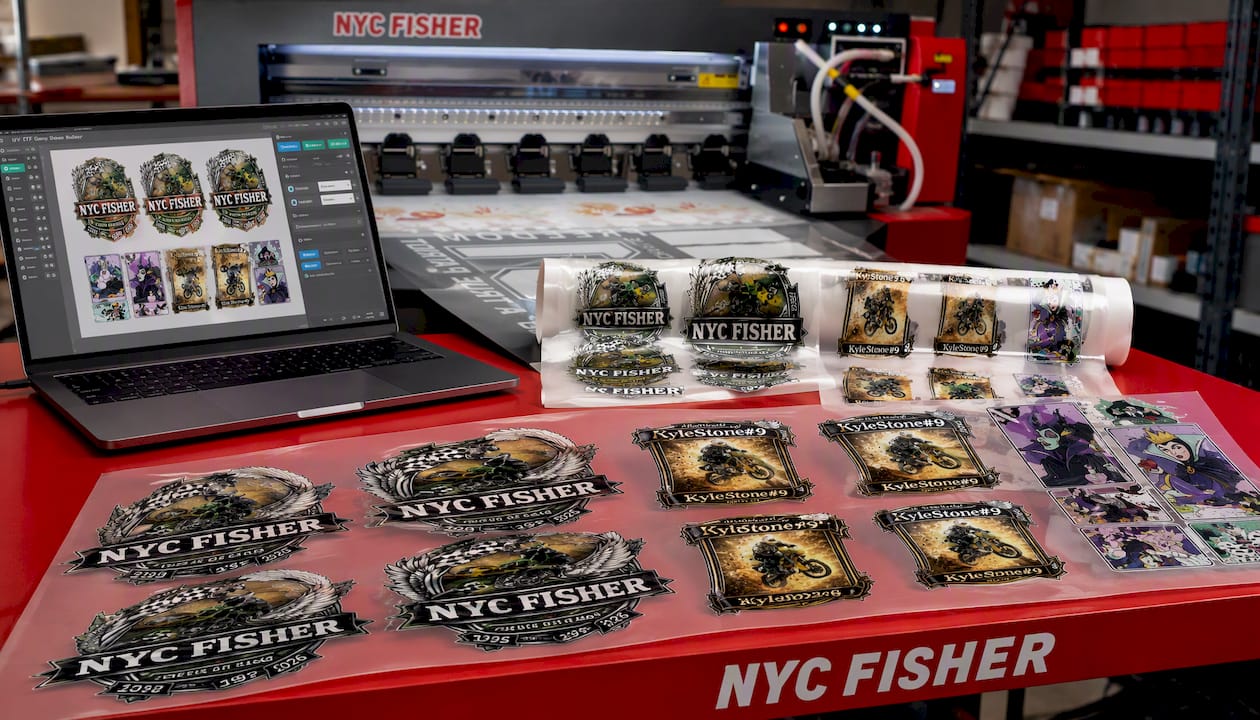
That in-house control matters most when you’re ordering for a specific event on a deadline. Need matching hoodies for a team? The Custom Basketball Mom Sweatshirt and the Custom Game Day Mom Sweatshirt both use the same cold-peel process detailed in this guide, pressed and second-pressed the same way in Waverly. Building school spirit gear? The Tigers Fight Song T-Shirt and Tigers Spirit T-Shirt show how detailed, multi-color designs hold up on cold-peel film. Embroidered pieces like the Patriotic AR-15 Embroidery Hat and the T*tties Embroidery Hat round out a team or event order without a separate vendor. For gifts, the White Rainbow 40oz Laser Engravable Tumbler and the I Love One Woman & Several Guns Tumbler give you a laser-engraved option alongside apparel in the same order.
To start, upload your artwork or build a gang sheet through the DTF transfer collection, and the team handles pressing settings, peel type, and second-press quality control before it ships.
Sources
- DTF Transfer Film: PET, Hot Peel & Cold Peel (Buying guide)
- Cold peel vs hot peel transfers — Printable Press
- DTF Cold Peel Instructions: Heat Press Temp, Time & Steps — Winnerjet
- Are the transfers hot peel or cold peel? How do I remove the film? — DTF Direct (support article)