

What Is DPI in Custom Printing: A Clear Guide
DPI in custom printing is defined as dots per inch: the number of individual ink dots a printer places within one linear inch of the printed surface. Higher DPI means more dots packed together, which produces sharper edges, finer detail, and smoother color gradients. Printers like those used for DTF transfers rely on precise dot placement to reproduce logos and artwork cleanly on fabric. Brands like Mixam, Custom Ink, and VistaPrint all treat 300 DPI as the baseline for quality prints viewed up close. If you are a small business owner or individual preparing files for custom apparel, understanding print resolution before you submit artwork saves you from blurry, pixelated results.
What is DPI in custom printing and how does it work?
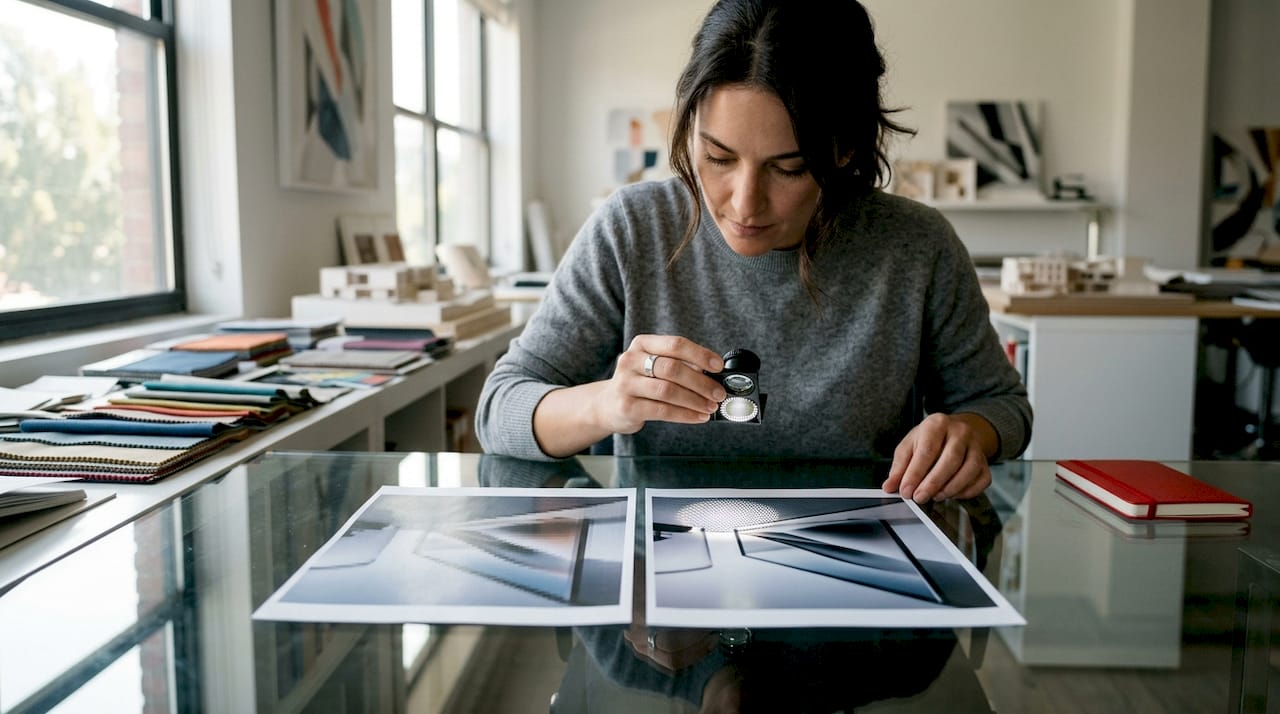
DPI describes the physical print dots an output device lays down, not the pixels in your digital file. A printer with a higher DPI setting places more dots per inch, which allows finer detail to appear in the final printed piece. At 300 DPI, dots are packed closely enough that the human eye merges them into a smooth, continuous image at a normal viewing distance of 12–18 inches. That visual merging is exactly why 300 DPI produces smooth images and has become the industry standard for close-up print materials.
DPI is often confused with PPI, which stands for pixels per inch. PPI is the resolution of your digital image file. DPI is the resolution of the printer’s output. They interact during printing but describe two completely different things. Mixing them up leads to the most common file preparation mistake in custom printing.
How does DPI differ from PPI and image resolution?
DPI is output resolution; PPI is input image resolution. DPI tells you how densely a printer applies ink. PPI tells you how many pixels exist in one inch of your digital image. When you send a file to a printer, the software maps your image pixels to the printer’s dot grid. The two numbers interact, but changing one does not automatically fix the other.
Here is the critical distinction most small business owners miss: changing the PPI metadata in your file changes the print size instructions, not the actual pixel count. If you have a 1,000 x 1,000 pixel image and you change the PPI tag from 250 to 100, the file now instructs the printer to print it larger. The image still has exactly 1,000 x 1,000 pixels. No new detail was added.
| Term | What it measures | Where it lives | Effect on print |
|---|---|---|---|
| DPI | Ink dots per inch | Printer hardware/settings | Controls physical dot density on paper or fabric |
| PPI | Pixels per inch | Digital image file metadata | Controls how large the image prints at a given resolution |
| Image resolution | Total pixel dimensions | Digital image file | Determines maximum printable size at target DPI |
Pro Tip: Before adjusting any DPI or PPI setting in Adobe Photoshop, check your total pixel dimensions first. A 300 x 300 pixel image will never produce a sharp 4 x 4 inch print at 300 DPI, regardless of what the metadata says.
What DPI settings should you use for different print types?
The right DPI depends on what you are printing and how far away viewers will stand. 300 DPI is the standard for any print material viewed at arm’s length or closer. That covers business cards, flyers, brochures, event programs, and custom apparel transfers. Custom Ink calls 300 DPI the gold standard for this reason.
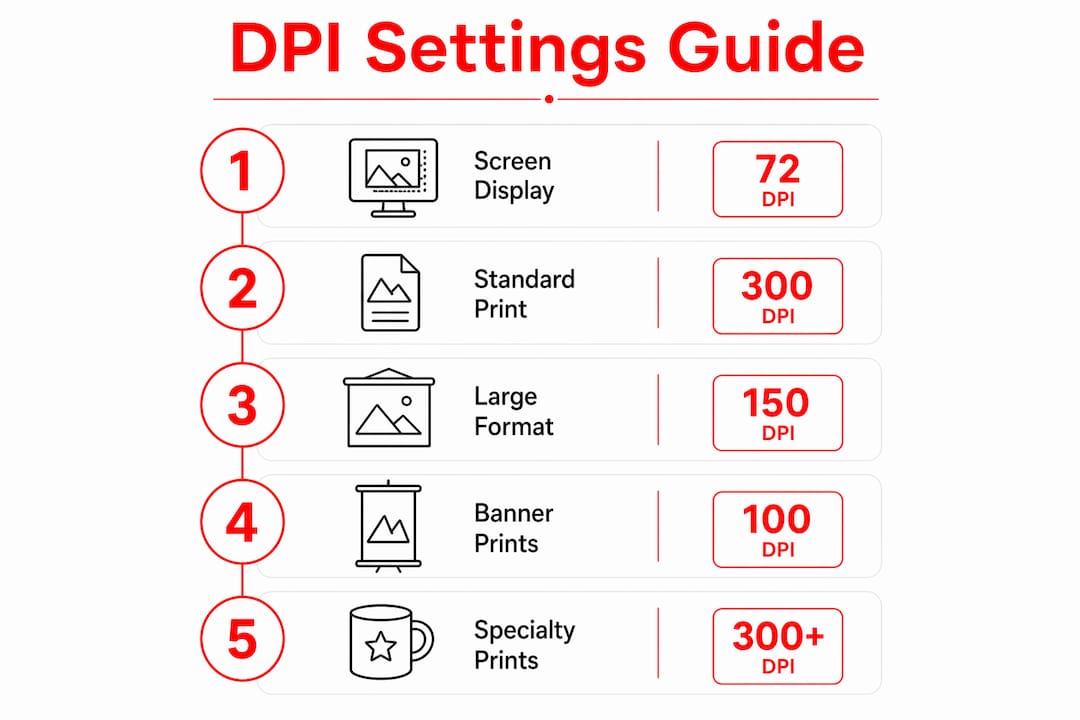
Large-format prints work differently. A banner or trade show display is viewed from several feet away, so the eye cannot distinguish individual dots at 300 DPI anyway. For those applications, 150 DPI is generally acceptable and keeps file sizes manageable. Archival photography and fine art reproduction sometimes push to 600 DPI or higher to capture fine tonal gradations.
Here is a quick reference by print type:
- Business cards, flyers, brochures: 300 DPI minimum
- Custom t-shirts and apparel (DTF, screen print): 300 DPI at final print size
- Posters viewed at 2–4 feet: 200–300 DPI
- Banners and large-format signage: 100–150 DPI
- Fine art and archival prints: 600 DPI or higher
- UV DTF decals and stickers: 300 DPI minimum for sharp edge detail
Pro Tip: Always set your DPI at the final intended print size, not the screen preview size. A logo that looks sharp at 72 DPI on your monitor may be only 2 inches wide at 300 DPI when printed.
How does DPI affect print quality and production workflow?
Higher DPI improves sharpness up to the limit of what the human eye can resolve at a given viewing distance. Beyond that threshold, increasing DPI adds cost and processing time without a visible benefit. Industrial digital inkjet printers typically operate at 600 x 600 to 1,200 x 1,200 DPI, balancing output quality against data load, ink consumption, and throughput speed.
The relationship between DPI and print quality also involves halftone screening. Halftone screening at 150 LPI is common in commercial offset printing, and the 300 DPI standard is directly tied to this technology. A printer using 150 lines per inch screening needs roughly twice that in DPI to render each halftone cell accurately. That historical relationship explains why 300 DPI became the rule rather than an arbitrary number.
Higher DPI increases data processing demand and ink consumption, which can reduce printing speed and affect consistency across a long print run. Print providers balance these trade-offs constantly. For small business owners ordering custom apparel or promotional products, the practical takeaway is that submitting files at exactly 300 DPI at final print size gives the printer everything it needs without creating oversized files that slow down production.
| DPI range | Typical printer type | Production effect |
|---|---|---|
| 72–96 DPI | Screen display | Not suitable for print output |
| 150–200 DPI | Large-format inkjet (banners) | Acceptable for viewing at 3+ feet |
| 300 DPI | Desktop inkjet, DTF, offset | Sharp detail for close-up viewing |
| 600–1,200 DPI | Industrial inkjet, laser | High detail, slower throughput, higher ink use |
Pro Tip: Ask your print provider what DPI their equipment actually outputs. A printer running at 600 DPI hardware resolution may still recommend 300 DPI artwork because the driver interpolates the difference. Matching your file to the provider’s spec avoids unnecessary file bloat.
How do you prepare image files with the correct DPI for printing?
File preparation is where most custom print problems start and end. The formula is straightforward: pixels needed = print size in inches × DPI. A 4 x 6 inch print at 300 DPI requires a 1,200 x 1,800 pixel image. A 24 x 36 inch poster at 300 DPI requires 7,200 x 10,800 pixels. Calculate this before you start designing, not after.
Follow these steps to prepare a print-ready file:
- Determine your final print size. Know the exact dimensions in inches before opening any design software.
- Calculate required pixel dimensions. Multiply each dimension by your target DPI (300 for most custom prints).
- Check your source image. Open the file in Adobe Photoshop and go to Image > Image Size. Confirm the pixel dimensions match or exceed your requirement.
- Adjust DPI without resampling first. In Photoshop’s Image Size dialog, uncheck “Resample.” Change the resolution to 300 DPI. The pixel count stays the same; only the print size instruction changes. If the resulting print size is too small, your image lacks sufficient pixels.
- Upscale only if necessary. If you need a larger print size, check “Resample” and use Preserve Details 2.0 or Bicubic Smoother. Understand that upscaling adds pixels through interpolation, not real image data.
- Save in the correct format. Use TIFF or high-quality PDF for offset and large-format printing. PNG at 300 DPI works well for DTF transfers. Review the DTF file requirements for apparel-specific specs before submitting.
Changing only the DPI metadata tag without adding real pixels does not fix a low-resolution image. Simply retagging a 72 DPI file to 300 DPI changes the print size instruction but leaves the pixel count identical. The printed result will still look soft or pixelated. True quality improvement requires either sourcing a higher-resolution original or genuine upscaling with a tool like Adobe Photoshop. For a full walkthrough of file formats and artwork setup, the artwork file prep guide covers every step in detail.
Key Takeaways
Print resolution in custom printing depends on DPI, pixel dimensions, viewing distance, and substrate working together, not on any single number in isolation.
| Point | Details |
|---|---|
| DPI defines ink dot density | Higher DPI places more dots per inch, producing sharper printed output. |
| 300 DPI is the close-up standard | Use 300 DPI for business cards, apparel, flyers, and any print viewed within arm’s reach. |
| PPI and DPI are different | PPI lives in your image file; DPI is a printer setting. Confusing them causes preparation errors. |
| Pixel count drives real quality | Changing DPI metadata without sufficient pixels does not improve print sharpness. |
| Large-format prints need less DPI | Banners and signage viewed from several feet away print acceptably at 100–150 DPI. |
What I have learned from years of watching DPI mistakes happen
The most common mistake I see from small business owners is submitting a logo pulled from a website. Website images are saved at 72 DPI for fast loading. They look fine on a screen. Printed on a shirt or a banner, they look like a blurry mess. The fix is not to change the DPI tag in Photoshop. The fix is to go back to the original vector file or request a high-resolution version from whoever designed the logo.
The second mistake is treating 300 DPI as a magic number that guarantees quality regardless of context. A 300 DPI file for a 2 x 2 inch print has 600 x 600 pixels. That same file stretched to a 10 x 10 inch print is now effectively 60 DPI. The number in the metadata still says 300. The print will still look terrible. DPI only means something when it is paired with the correct pixel dimensions for the intended print size.
What actually works is thinking about the end product first. Decide the final size. Calculate the pixels you need. Check your source file against that number before you spend a minute designing. If the source does not have enough pixels, fix it at the start. Fixing it after the fact costs more time and often produces worse results than starting with the right file.
The broader point is that DPI is one variable in a system. Substrate, ink type, printer technology, and viewing distance all shape the final result. A DTF transfer on a cotton hoodie behaves differently than an offset-printed flyer, even at identical DPI settings. Understanding the full process, not just the number, is what separates a clean print from a frustrating reprint.
— Aaron
Custom printing with Handmadeohiocrafts
Handmadeohiocrafts designs and produces every order in-house at our Waverly, Ohio facility, which means file quality directly affects what comes off our equipment. When your artwork arrives at 300 DPI with the correct pixel dimensions, the result is sharp, vibrant, and ready to wear or display.
Our custom apparel collection covers t-shirts, hoodies, crewnecks, hats, and more, all produced with DTF transfer technology that demands clean, high-resolution files. Before you submit, check our DTF transfer specs to confirm your file meets every requirement. No minimum order, nationwide shipping, and a team that will flag file issues before printing rather than after.
FAQ
What does DPI mean in printing?
DPI stands for dots per inch and measures how many ink dots a printer places within one linear inch of the printed surface. Higher DPI produces finer detail and sharper edges in the finished print.
What is the best DPI for custom t-shirt printing?
300 DPI at the final print size is the standard for custom apparel, including DTF transfers and screen printing. Submitting artwork below 300 DPI risks soft edges and visible pixelation on the finished garment.
Does changing DPI in Photoshop improve print quality?
Changing the DPI metadata tag without resampling does not add pixels or improve quality. Real improvement requires either sourcing a higher-resolution image or using Photoshop’s resample function to add pixels through interpolation.
What DPI should I use for banners and large-format prints?
Large-format prints viewed from several feet away print acceptably at 100–150 DPI. The human eye cannot resolve 300 DPI detail at that distance, so lower resolution keeps file sizes manageable without sacrificing visible quality.
How do I calculate the pixels I need for a print?
Multiply the print width in inches by your target DPI to get the required pixel width, and do the same for height. A 4 x 6 inch print at 300 DPI requires a 1,200 x 1,800 pixel image.