

How to Design Custom Shirts at Home: DIY Guide
Designing a custom shirt at home means creating unique, personalized apparel using accessible DIY methods like iron-on transfers, fabric paint, or heat transfer vinyl (HTV). These techniques require no professional printing equipment and work well for gifts, events, or personal style projects. The 8–9 main methods to create custom shirts range from beginner-friendly fabric paint to more technical HTV cutting and pressing. Whether you want a one-off design or a small batch for a group, you can design custom shirt at home with tools you likely already own or can pick up inexpensively.
What tools and materials do you need to design custom shirts at home?
The right tools make or break your results. Basic tools include an inkjet or laser printer for transfer paper, a household iron or heat press, cutting tools for HTV, and fabric paints or markers. Each method has its own supply list, so knowing what you need before you start saves time and money.
Here is a quick breakdown by method:
- Iron-on transfers: Inkjet or laser printer, iron-on transfer paper, household iron or heat press, scissors or craft knife
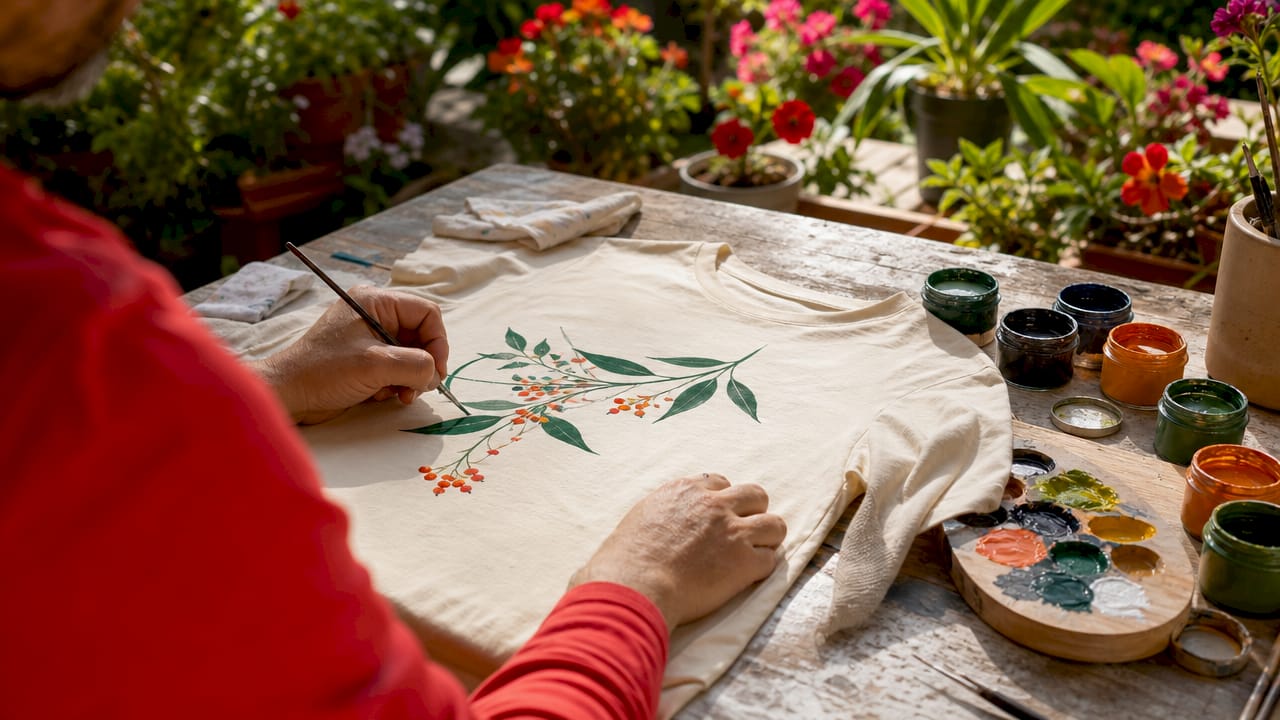
- Fabric paint: Fabric paint or fabric markers, stencils or freehand brushes, cardboard insert for the shirt, heat-setting iron
- Heat transfer vinyl (HTV): HTV sheets, a vinyl cutter (like a Cricut or Silhouette), weeding tools, heat press or iron
Shirt fabric matters more than most beginners expect. 100% cotton absorbs fabric paint and iron-on transfers best. Polyester blends work better with HTV. Avoid stretchy fabrics like spandex for your first projects since they distort designs during pressing.
| Method | Key Equipment | Best Fabric | Skill Level |
|---|---|---|---|
| Iron-on transfer | Printer, iron, transfer paper | 100% cotton | Beginner |
| Fabric paint | Brushes, stencils, paint | Cotton or canvas | Beginner |
| HTV | Vinyl cutter, heat press | Cotton or poly blend | Intermediate |
Safety note: Heat presses reach temperatures above 300°F. Always use heat-resistant gloves and keep children away from the work area. Fabric paints and adhesive sprays should be used in a well-ventilated space.
Pro Tip: Buy blank shirts in a heavier weight cotton, at least 5.5 oz per square yard. Thin shirts show uneven transfers and bleed paint more easily.
How do you create designs and prepare them for printing?
Design preparation is where most beginners lose time. You have three main paths: draw your design by hand and scan it, create it digitally from scratch, or use a template from a free online design tool. Free browser-based programs like Canva or Adobe Express offer shirt-specific templates that work well for text-heavy designs and simple graphics.
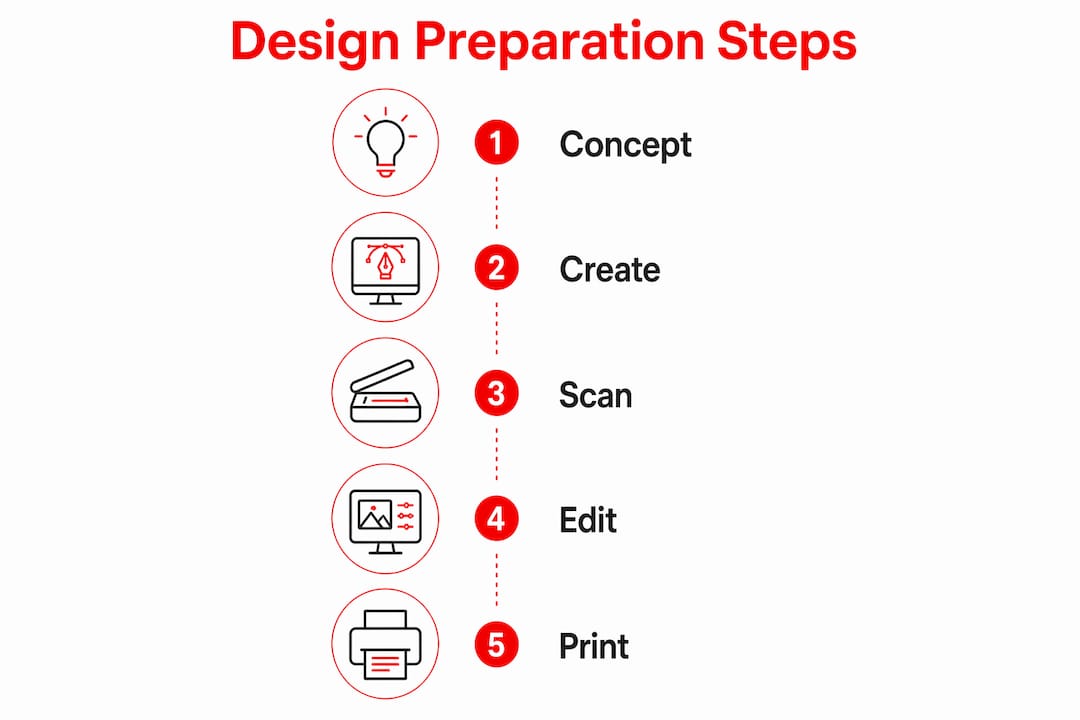
Resolution is the single most important technical factor. Any design you plan to print should be at least 300 DPI (dots per inch). Low-resolution images print blurry, and that flaw becomes permanent once it is pressed onto fabric. Export your files as PNG with a transparent background for the cleanest results.
Mirror-imaging your artwork before printing is a step most beginners skip entirely. For iron-on transfers, the design prints face-down onto the transfer paper and then flips onto the shirt. If you do not flip it horizontally before printing, all text and asymmetric graphics will appear reversed on the finished shirt.
Color choice also affects your outcome by method:
- Iron-on transfers: Use high-contrast colors. Pale yellows and light grays disappear on white shirts.
- Fabric paint: Stick to 3–4 colors for clean results. More colors increase the chance of bleeding.
- HTV: Each color requires a separate vinyl layer and a separate press. Plan your design with that in mind.
Pro Tip: Print your design on regular paper first and hold it up to a mirror. If it reads correctly in the mirror, it is ready to print on transfer paper.
What are the step-by-step methods to apply your design to shirts?
Iron-on transfer application
- Pre-wash and dry your shirt to remove sizing chemicals that block adhesion.
- Print your mirrored design onto iron-on transfer paper using an inkjet printer.
- Trim excess transfer paper close to the design edges.
- Place the shirt on a hard, flat surface. Insert a piece of cardboard inside the shirt.
- Position the transfer face-down on the shirt.
- Press a hot iron (cotton setting, no steam) firmly over the transfer for 30–60 seconds. Apply even pressure.
- Let it cool for 2 minutes, then peel the backing slowly from one corner.
Fabric paint with stencils
- Tape a stencil firmly to the shirt using painter’s tape to prevent bleeding.
- Insert cardboard inside the shirt to create a firm surface.
- Apply fabric paint in thin, even layers using a sponge brush. Dab, do not stroke.
- Let each layer dry fully before adding another color.
- Once complete, heat-set the paint by pressing a dry iron over the design for 30 seconds.
HTV application
- Create your design in a vinyl cutting program and mirror it before cutting.
- Cut the HTV with your vinyl cutter, then weed away the excess vinyl using a weeding tool.
- Place the HTV design shiny-side down on the shirt.
- Press with a heat press at the temperature specified for your HTV brand, typically 305°F for 15 seconds.
- Peel the carrier sheet while warm for most HTV types. Check your brand’s instructions.
Durability comparison by method:
| Method | Expected Wash Life | Look and Feel |
|---|---|---|
| Iron-on transfer | 10–20 washes before peeling | Slightly stiff, glossy |
| Fabric paint | 20–30 washes with heat-setting | Soft, matte, hand-painted |
| HTV | 40+ washes with proper pressing | Smooth, slightly raised |
What are common DIY mistakes when designing custom shirts at home?
Most DIY shirt failures trace back to a small set of avoidable errors. Knowing them before you start puts you ahead of the majority of first-timers.
- Skipping the mirror flip. Forgetting to horizontally flip your design before printing iron-on transfers is the most common beginner mistake. Text and logos come out backwards every time.
- Uneven heat and pressure. A household iron has hot spots. Moving it in small circles rather than holding it still in one spot gives more even heat distribution.
- Wrong fabric type. Polyester and synthetic blends repel iron-on transfers. Always check your shirt’s fabric content before choosing your method.
- Too much paint at once. Thick layers of fabric paint crack after washing. Thin, layered coats bond to the fabric fibers better.
- Skipping the cure step. Fabric paint that is not heat-set fades dramatically after the first wash. Iron over the dry design for 30 seconds before wearing.
Washing shirts inside out in cold water and air drying them extends the life of any home-printed design significantly. This single care habit reduces cracking and fading more than any other post-application step.
Pro Tip: Do a test transfer on a scrap piece of the same fabric before committing to your final shirt. This catches temperature and timing issues before they ruin your best blank.
How can you expand your custom shirt projects with creative DIY ideas?
Once you have the basics down, combining methods produces results that look genuinely professional. Layering HTV over a fabric-painted background creates depth that neither method achieves alone. Adding embroidery accents on top of a printed design gives texture that screen printing cannot replicate.
Here are creative directions worth trying:
- Tie-dye base with HTV overlay: Tie-dye the shirt first, let it cure fully, then press an HTV design on top. The contrast between the organic dye pattern and the clean vinyl graphic is striking.
- Multi-color stencil painting: Cut a series of stencils for a single design, each representing one color layer. Apply them in sequence for a look similar to screen printing.
- Photo transfer shirts: Print a high-resolution personal photo onto photo transfer paper and press it onto a shirt. Works best on white or light-colored cotton.
- Mixed media gifts: Combine a custom shirt with personalized apparel from Handmadeohiocrafts for a complete gift set that pairs DIY charm with professional quality.
For creators who want to scale beyond personal use, print-on-demand services let you upload your designs and fulfill orders without buying inventory. This works well once you have refined a design through DIY testing and want to sell it without investing in equipment. DIY methods are best for creative expression and small runs, while professional methods better serve branding, resale value, and durability needs. Knowing which goal you are chasing helps you pick the right path from the start.
For more ideas on what to create, the 2026 custom t-shirt design guide from Handmadeohiocrafts covers current trends and creative directions worth exploring.
Key takeaways
The most effective way to design custom shirts at home is to match your method to your fabric, prepare your artwork at 300 DPI, and always mirror-image transfers before printing.
| Point | Details |
|---|---|
| Match method to fabric | Use iron-on transfers on 100% cotton; use HTV on cotton or poly blends for best adhesion. |
| Mirror-image before printing | Flip artwork horizontally before printing on transfer paper to avoid reversed text and graphics. |
| Layer thin paint coats | Apply fabric paint in thin layers and heat-set when dry to prevent cracking after washing. |
| Extend print life with proper care | Wash shirts inside out in cold water and air dry to reduce fading and peeling. |
| Test before committing | Always do a test press on scrap fabric to catch heat and timing issues before using your final shirt. |
What I have learned from years of making custom shirts at home
The learning curve for DIY shirt design is real, but it is shorter than most people expect. The first shirt I pressed with iron-on transfer came out with backwards text because I skipped the mirror step. That mistake cost me one shirt and taught me more than any tutorial did.
The part that surprises most people is how much the blank shirt matters. You can have a perfect design and ruin it on a cheap, thin shirt. Spending a little more on quality blanks is the single upgrade that improves results the fastest.
Imperfections are part of the process and honestly part of the appeal. A hand-painted shirt with a slightly uneven edge tells a story that a factory-printed shirt never will. That is the whole point of making something yourself. Embrace the texture, the slight variation, the evidence of your hands in the work.
Where I see people get stuck is trying to replicate professional results with DIY tools. That is the wrong goal. DIY shirts are not trying to compete with DTG or screen printing on durability or precision. They are competing on meaning, speed, and creativity. Once you accept that, the whole process becomes more enjoyable and the results feel more satisfying.
— Aaron
Handmadeohiocrafts custom apparel for your DIY projects
When your DIY designs are ready for a professional upgrade, Handmadeohiocrafts produces custom apparel with the same attention to detail you put into your home projects.
Handmadeohiocrafts specializes in DTF transfer printing, which delivers vibrant, wash-resistant results that outlast iron-on transfers by years. Based in Waverly, Ohio, with no minimum order requirements and nationwide shipping, Handmadeohiocrafts makes it easy to take your designs from a home project to a finished, professional product. Browse the full custom apparel collection to find shirts, hoodies, and more that pair perfectly with your creative ideas.
FAQ
What is the easiest method to design a custom shirt at home?
Iron-on transfers are the easiest starting point because they require only a printer, transfer paper, and a household iron. The main skill to learn is mirror-imaging your design before printing.
How long do DIY custom shirt designs last?
Iron-on transfers typically last 10–20 washes before peeling, while HTV lasts 40 or more washes with proper pressing. Washing inside out in cold water and air drying extends the life of any home-printed design.
Do I need a heat press to make custom shirts at home?
A household iron works for both iron-on transfers and HTV, though a heat press delivers more consistent temperature and pressure. A heat press reduces the risk of uneven adhesion and produces more durable results over time.
What file format works best for shirt designs?
PNG files with a transparent background at 300 DPI produce the cleanest prints for iron-on transfers and digital design tools. Avoid JPEG files for designs with text or fine lines since compression artifacts become visible when printed large.
Can I sell shirts I design at home?
Yes, but DIY methods are less recommended when durability or resale value is a priority. For shirts you plan to sell, professional printing methods like DTF or screen printing produce more consistent, longer-lasting results.