

What Does Print Placement Mean for Custom Apparel?
Print placement is defined as the exact position where a design is applied on a garment, such as the center front, left chest, or upper back. Getting this right determines whether a finished shirt looks professional or off-balance. For small business owners ordering branded tees or individuals creating custom hoodies, understanding print placement explained clearly can save money, reduce reprints, and produce results that actually match your vision. This guide covers the print placement definition, standard industry measurements, common mistakes, and practical steps to get it right every time.
What does print placement mean, and why does it matter?
Print placement defines where on a garment a design lands, not just the size of the design itself. The industry term used by decorators and production teams is “placement printing,” which refers to deliberately positioning artwork on specific, pre-cut garment panels. This is different from simply having a large or small print. A logo placed 4 inches below the collar reads very differently than the same logo placed 7 inches below it.
Standard industry guidelines specify that full-front designs sit 2.5–3 inches below the collar, while left-chest designs land 7–9 inches from the shoulder seam on adult garments. These numbers exist because the human eye expects visual balance. When a design falls outside these ranges, the garment looks rushed, even if the print quality itself is excellent.
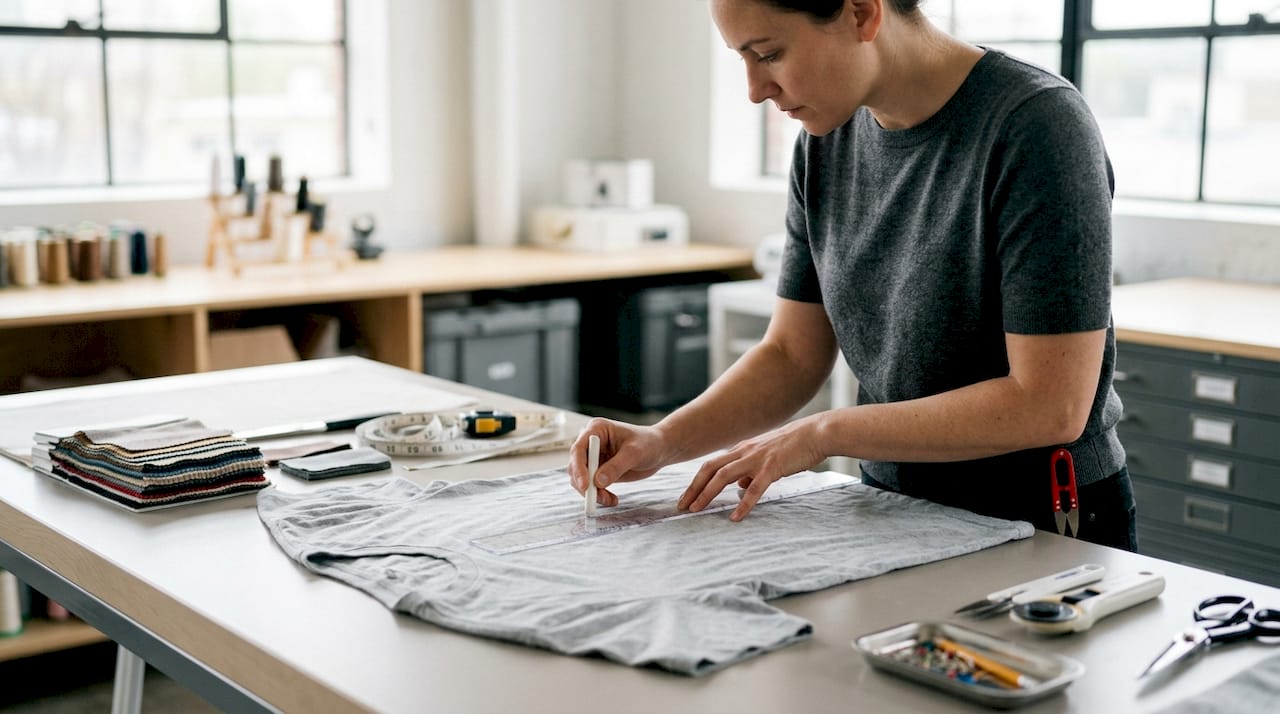
Print placement also affects how a design interacts with the body. A graphic centered too high crowds the neckline. One placed too low disappears under a jacket. Placement is the invisible decision that makes a design work on a real person wearing a real garment.
How does print placement differ from print area and all-over printing?
These three terms confuse a lot of buyers, and the confusion leads to mismatched expectations. Here is how they actually differ.
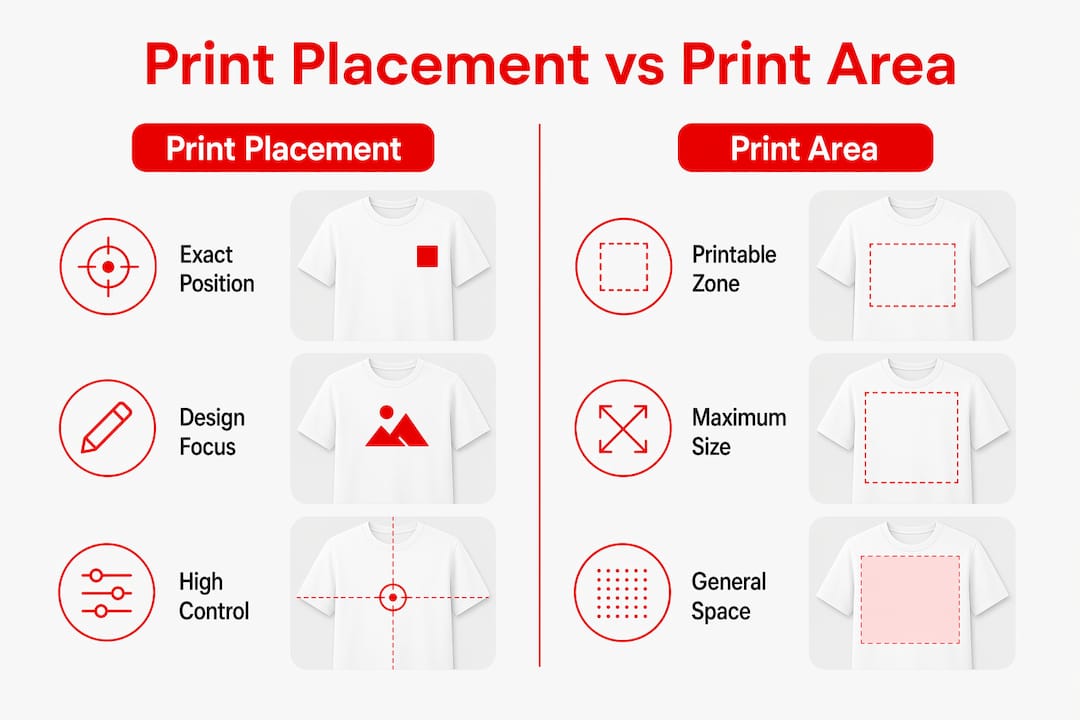
The print area is the total printable zone available on a garment section. It is the maximum space a printer can physically reach on the front, back, or sleeve. Print placement is the chosen position within that zone. You can have a large print area but still choose to place a small logo in the upper-left corner of it.
All-over printing (AOP) works completely differently. AOP applies repeating patterns across fabric rolls before the garment is cut and sewn. The pattern drops randomly on cut pieces, which means you cannot control exactly where a specific graphic lands on the finished shirt. AOP is faster and generates less material waste, but it offers far less design control than placement printing.
| Feature | Placement printing | All-over printing |
|---|---|---|
| Design control | High: exact position chosen | Low: pattern drops randomly |
| Production complexity | Higher: unique files per size | Lower: continuous roll printing |
| Cost | Higher per unit | Lower per unit at scale |
| Best for | Logos, branded apparel, focused graphics | Patterns, fashion prints, lifestyle apparel |
| File preparation | Graded artwork per size required | Single repeating tile file |
Placement printing is the right choice when your design has a specific focal point, like a company logo, a team name, or a personalized graphic. AOP suits fashion-forward patterns where random placement is part of the aesthetic.
Standard print placement locations and measurements for apparel
Knowing the standard locations gives you a shared language with your printer and prevents guesswork on both sides.
The four most common placement zones are the full front, left chest, full back, and sleeve. Each has accepted measurement ranges that professional decorators follow.
| Location | Distance from reference point | Typical design width |
|---|---|---|
| Full front | 2.5–3 inches below collar | 10–12 inches |
| Left chest | 7–9 inches from shoulder seam | 3–4 inches |
| Full back | 4–5 inches below collar | 10–12 inches |
| Sleeve | 2–3 inches below shoulder seam | 3–4 inches |
These measurements apply to adult medium garments and serve as the baseline. Size grading adjusts the design’s position and scale for each garment size. A logo that looks balanced on a Small but is not resized for an XXL gives an unprofessional result. The artwork must scale proportionally so the visual weight stays consistent across the full size run.
Pro Tip: Before sending files to your printer, put on a shirt of the size you are ordering and use a ruler to mark where 3 inches below the collar actually falls on your body. It is almost always higher than people expect.
Left-chest placement is the most common choice for business logos and team branding. It sits in the natural eye-line when someone extends a hand for a handshake. Full-front placement works for bold graphics, event shirts, and designs meant to be seen from a distance. Back placement suits names, numbers, and large statement graphics.
Why correct print placement matters for quality and branding
Misplaced prints signal a lack of attention to detail, and customers notice. Incorrect print placement leads to amateurish appearances and increased customer complaints. Common errors include printing too close to the collar, placing a design off-center horizontally, or using the same file for every garment size without adjusting position.
The business impact is real. A shirt that looks slightly wrong gets returned, photographed, and shared. For a small business building a brand, one bad batch of shirts can undermine months of marketing effort. Consistent placements reflect attention to detail and technical mastery, which directly shapes how customers perceive your brand.
Here are the most common placement mistakes and how to avoid them:
- Too close to the collar: Designs placed less than 2 inches below the collar look cramped and get distorted by neckline seams.
- Off-center horizontal placement: Even a half-inch shift left or right is visible to the eye. Always measure from the center seam, not from the edge of the fabric.
- No size grading: Using one file for XS through XXL means the design appears massive on small shirts and tiny on large ones.
- Ignoring pocket placement: On shirts with chest pockets, the left-chest logo must account for the pocket or it will be partially covered.
- Eyeballing instead of measuring: Professional decorators use standardized placement charts for every run, not visual estimates.
Pro Tip: Always request a physical sample or a digital mockup showing exact placement before approving a full production run. A mockup costs nothing. A reprinted order costs everything.
How placement printing is executed in production
Getting placement right in production requires more steps than most buyers realize. Here is how the process works from artwork to finished garment.
- Garment mapping: The designer places artwork onto a digital pattern piece that matches the actual cut shape of the garment. This accounts for seams, hems, and the garment’s grain direction.
- Bleed and alignment: Artwork for placement printing includes bleed beyond cut lines and accounts for fabric stretch and grain. This prevents white edges or misaligned graphics after sewing.
- Size grading: Placement printing requires unique digital files for every garment size to maintain consistent positioning and proportion. A size Small file and a size XL file are not the same document.
- Manual alignment: On a heat press or screen printing platen, the operator aligns the garment or transfer to match the specified placement coordinates. Even a small fabric shift during this step can ruin the piece.
- Quality check: Each printed piece is measured against the placement spec before moving to the next production stage. This step catches errors before they multiply across a full run.
Fabric behavior adds another layer of complexity. Stretch fabrics like jersey knit can shift during pressing, pulling a design off its intended position. Manual alignment of fabrics or pre-printed panels is critical, and even minor shifts can ruin garments and increase waste. This is why placement printing costs more per unit than AOP. The extra cost buys you control and consistency.
For buyers using DTF transfer setup, the placement coordinates must be specified in the transfer file itself, so the operator knows exactly where to position the transfer on the garment before pressing.
Practical tips for small business owners to improve placement outcomes
Understanding print placement in design is one thing. Applying it to a real order is another. These steps close the gap.
- Use a placement chart every time. Download a standard apparel placement chart and share it with your printer as part of every order. This removes ambiguity and gives both sides a written reference.
- Specify placement in writing. Do not rely on verbal instructions. Write the exact distance from the collar and the center point in your order notes. Printers work from written specs, not memory.
- Prepare your artwork files correctly. Files should be high-resolution, sized to the actual print dimensions, and labeled with the intended placement location. A file named “logo_leftchest_3.5in.png” communicates more than “logo_final_v2.png.”
- Choose placement printing for branded products. Placement printing produces a designer-grade product with a bespoke look that commodity items cannot match. If your brand depends on looking professional, placement printing is the right method.
- Grade your artwork for each size. If you are ordering XS through XXL, ask your printer whether they grade the artwork or use a single file. A printer who grades artwork for each size is doing the job correctly.
- Visualize the design on a real body. Designers must visualize placement prints on real garments considering body form and fabric behavior. Sketch or mock up the design on a body template, not just a flat garment outline.
For small batch printing, placement consistency matters even more because there is no large run to average out errors. Every shirt in a 12-piece order is visible.
Key Takeaways
Print placement is the single most controllable factor in whether custom apparel looks professional or amateur, and it requires measurement, graded artwork, and written specs on every order.
| Point | Details |
|---|---|
| Print placement definition | Print placement is the exact, intentional position of a design on a garment, not just its size. |
| Standard measurements | Full-front designs sit 2.5–3 inches below the collar; left-chest logos land 7–9 inches from the shoulder. |
| Size grading is required | Artwork must be scaled and repositioned for each garment size to maintain visual balance. |
| Placement vs. AOP | Placement printing gives precise design control; all-over printing is faster but drops patterns randomly. |
| Avoid common errors | Never eyeball placement. Use standardized charts, written specs, and request a mockup before full production. |
Why I think most people underestimate print placement
Most people ordering custom shirts focus almost entirely on the design itself. They spend hours on the artwork and then write “center front” in the notes and call it done. That is where the problems start.
I have seen beautifully designed logos land two inches off-center because nobody specified the measurement. I have seen a full-front graphic that looked perfect on a medium sit awkwardly high on a small because the file was never graded. These are not printer errors. They are communication failures, and they are entirely preventable.
The part that surprises most small business owners is how much placement affects perceived quality. Two shirts with identical print quality can look completely different based on placement alone. The one placed correctly reads as a premium product. The other reads as a DIY project. That gap in perception directly affects whether a customer wears your shirt in public, which is the whole point of branded apparel.
Consistency is the real differentiator. A single well-placed shirt is nice. A run of 50 shirts where every logo lands in exactly the same spot signals that you take your brand seriously. That consistency is what separates businesses that look established from ones that look like they are still figuring it out.
— Aaron
Custom apparel with placement you can count on
Handmadeohiocrafts handles placement the right way, with measurements, graded artwork, and in-house production that keeps every detail under control.
Whether you need a left-chest logo on a run of business polos or a bold full-front graphic on event hoodies, Handmadeohiocrafts works with you to specify exact placement before a single shirt is pressed. The team produces everything in-house in Waverly, Ohio, which means no outsourced guesswork and fast turnaround on orders of any size. Explore the full range of custom apparel options and bring your design to life with placement that matches your vision exactly.
FAQ
What does print placement mean on a custom shirt?
Print placement is the exact position where a design is applied on a garment, such as 3 inches below the collar for a full-front print or 7–9 inches from the shoulder for a left-chest logo.
What is the difference between print placement and print area?
The print area is the total printable zone available on a garment section. Print placement is the specific chosen position within that zone where the design actually lands.
Why does print placement need to change for different garment sizes?
A design file sized for a medium will appear too large on a small and too small on an XL. Artwork must be graded and repositioned for each size to maintain visual balance across the full size run.
What are the most common print placement mistakes?
The most common errors are placing designs too close to the collar, failing to center horizontally, and using one file for all sizes without grading. Professional decorators use standardized measurement charts to avoid these issues.
How do I specify print placement when ordering custom apparel?
Write the exact distance from the collar or shoulder seam in your order notes, share a placement chart with your printer, and request a digital mockup showing the design position before approving production.